
How to Manage Patients in OtoAccess® Database
Create patient
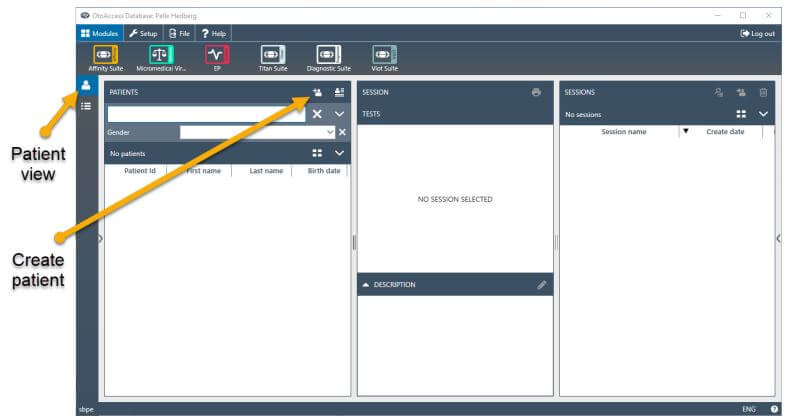
- Choose patient view.
- Click the create patient icon
 .
. - Fill out patient information, note that fields marked with an arrow are mandatory. The unmarked
fields and the remark field are optional.
Date can be filled out manually or by clicking the calendar button .
.
By clicking the plus icon you can add a photo to the profile.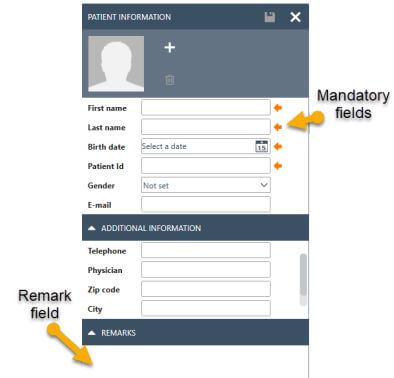
- When done press the save button
 .
. - The patient has now been created.
Available patient fields
In the OtoAccess® Database administration tool you can set up what fields you want to make available, set as mandatory or even set up custom fields.
Delete/edit patient
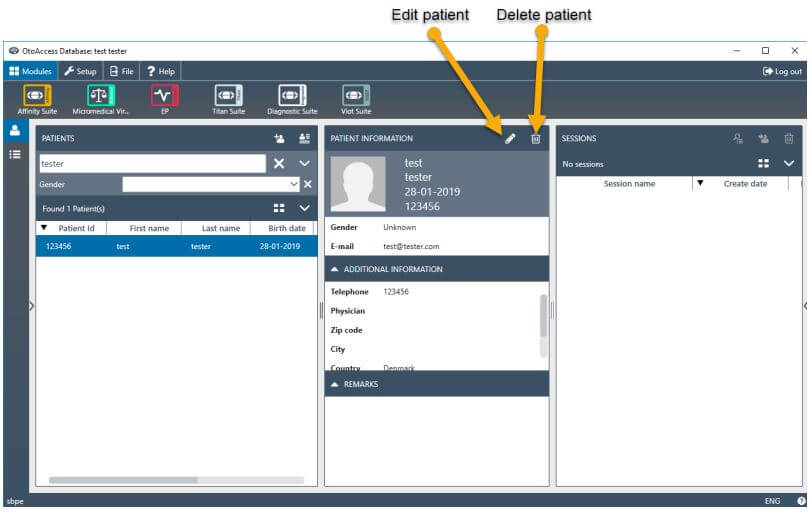
Simply select the patient and choose delete  or edit
  in the patient view.
When you choose delete you are prompted before deletion.
Presenter