
How to perform the Lateral Head Roll test

By Dr Michelle Petrak

The Lateral Head Roll test is part of the VORTEQTM Assessment bundle. The Lateral Head Roll test is performed to identify horizontal canal BPPV and has additional features that provide significant improvements over the standard positional tests:

  • 3D head model guide to show the head position of the patient in real-time and during playback.
  • Guide to assist in proper head placement with exact degree of head positioning.
  • Torsion eye graph.
  • Pause during roll right and roll left to ensure clean data collection.
  • Automatic test start (optional).

Calibration

If you have not previously calibrated your eyes, you must do that first. It is also required to calibrate for torsion prior to this test.
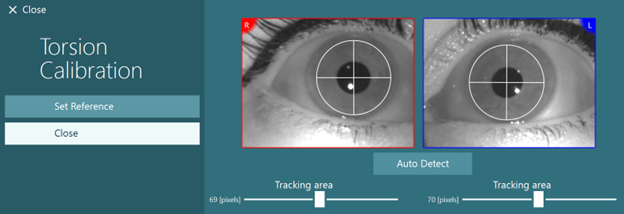
Torsion Calibration screen displaying live video of the right and left eyes. An Auto Detect function automatically detects the center of the pupil, with a customizable, circular tracking area in pixels.
Figure 1: Calibration for torsional eye tracking in the Lateral Head Roll test.

Performing the test

Select the Lateral Head Roll test from your test menu.

Once the system is calibrated, you are ready to begin testing. You will use the 3D head model to guide you through the appropriate head/body positions for the test. Make sure the VORTEQ IMU is attached to the goggles and turned on. The test is performed with the patient supine (laying down).

Step 1 is to turn the patient's head 45 degrees toward the right.

Step 2 is to turn the patient's head 45 degrees toward the left.

The black bar represents the head movement, and when the head is in the correct position, the shaded area will turn green, and you will see a degree of head position. Once you have reached the first position, you can record for a minimum of 20 seconds, then press continue.

In between head roll right and left positions, there is a pause to allow the patient to get in the proper next position without adding noisy data to the recording.

Here you see that just after head right was completed, the data collection paused to allow for the patient to get into the head left position. You can click 'Resume' when the patient is in the proper head position and continue data collection (Figure 2).
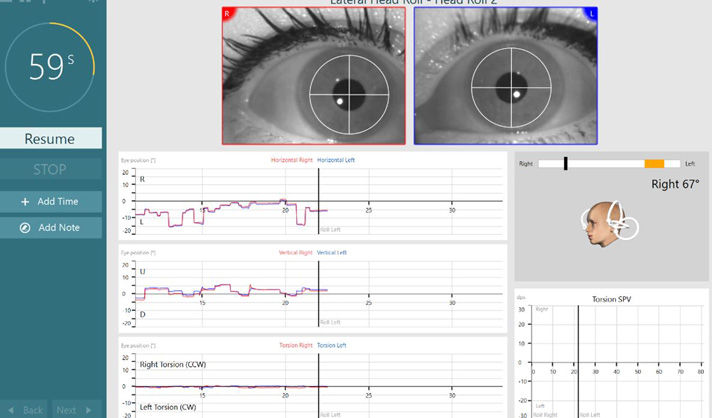
Lateral Head Roll test screen. To the left the user has the options to Resume, STOP, Add Time, or Add Note. In the middle there is a live video feed of the right and left eyes and horizontal, vertical, and torsional eye position data. The 3D head model is to the right, displaying the current head position visually and in the amount of degrees.
Figure 2: Pause in data collection between head positions.

Results

When you have completed the test, you will see a summary screen with bar graphs representing any nystagmus that was generated during the maneuver (Figure 3). Any nystagmus greater than 6 degrees per second will be shown highlighted in grey and represents an abnormal finding.

There is a torsional eye movements graph that is also present at the bottom of the screen. Horizontal canal BPPV should not result in torsional eye movements, so this can help with diagnostic accuracy. There is also a graph in the lower right corner that measures the slow phase velocity (SPV) of the eye tracing.
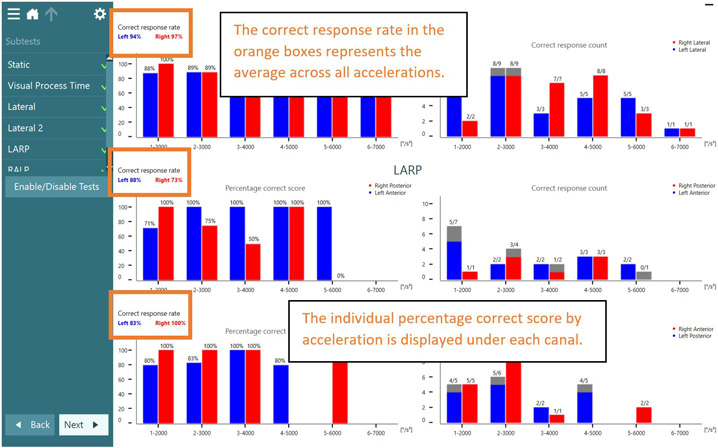
Figure 3: Summary screen showing results from the head roll right and left. Note the horizontal, vertical and torsional eye tracing graphs.

As there are two different sections of the test (head roll right and head roll left), the nystagmus is measured for each of these sections. On the summary screen, you can scroll between page 1 and page 2 of the data to view any measured nystagmus from these sections (Figure 4).
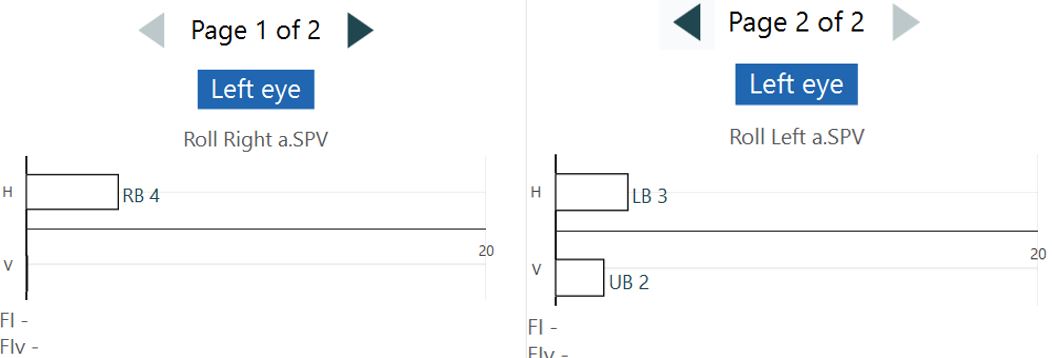
Figure 4: Measured nystagmus to head roll right and head roll left. Normal nystagmus will be shown with a white bar, abnormal nystagmus is marked with a red diamond and there will be a gray bar if nystagmus exceeds normal limits.

Test parameters

Under Protocol Management > Lateral Head Roll > Test Parameters, you have the ability to edit the order, amount, target angle, and duration of test sections (Figure 5).
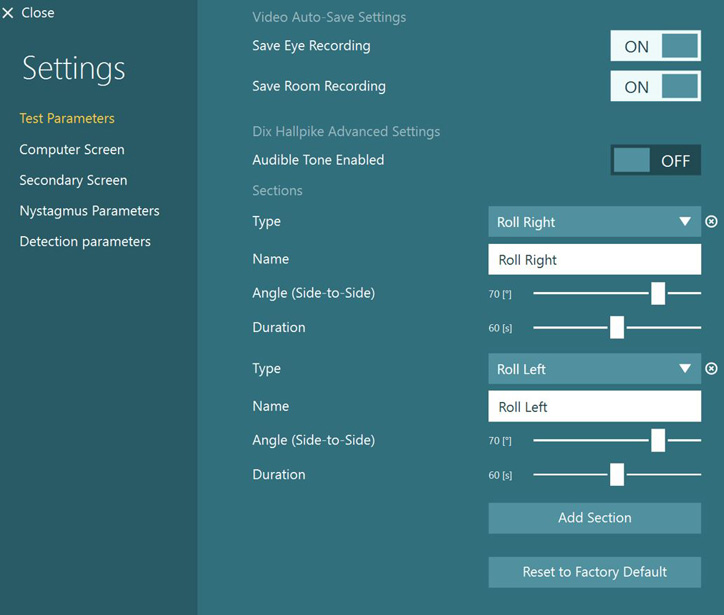
In this example, the user has two test sections in this order: Roll Right and Roll Left. For both test sections, the angle is set to 70 degrees (side-to-side) and the duration is set to 60 seconds. Both these parameters can be adjusted using a slider.
Figure 5: Test Parameters customization.

Computer Screen customization

Under Protocol Management > Lateral Head Roll > Computer Screen, you can edit various video and tracing settings (Figure 6).
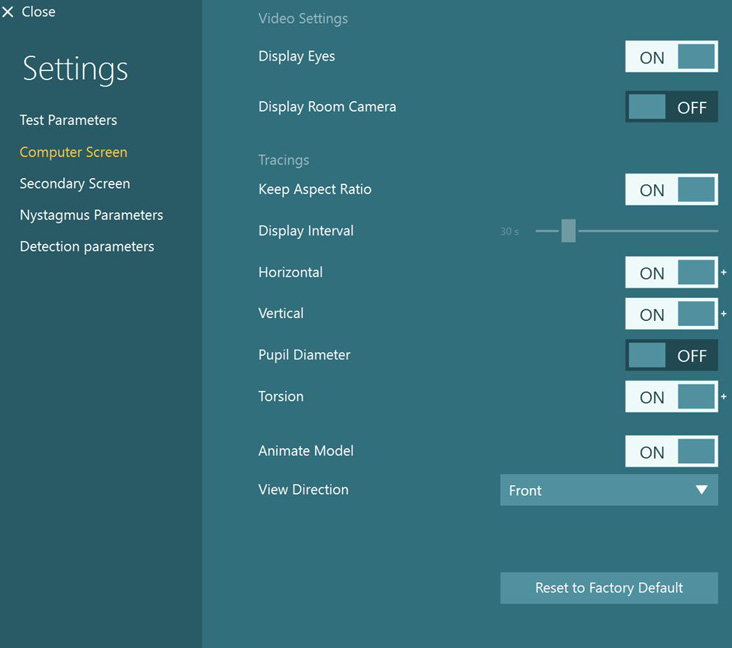
The settings are divided into two sections: Video Settings and Tracings. Under Video Settings, the user can toggle Display Eyes and Display Room Camera on or off. Under Tracings, the following can be toggled on or off: Keep Aspect Ratio, Horizontal, Vertical, Pupil Diameter, Torsion, and Animate Model. Display Interval in seconds can be adjusted with a slider. View Direction is set to Front and can be adjusted via a drop down menu.
Figure 6: Computer Screen customization.

Optional feature: Automatic Test Start

Automatic Test Start is an optional feature you can enable for a time-saving aspect of your protocol and appointment. This means that the test will automatically begin a couple of seconds after the patient is in the correct position (as represented by the head model and green target bar).

To turn on this feature, go to Protocol Management > Lateral Head Roll.
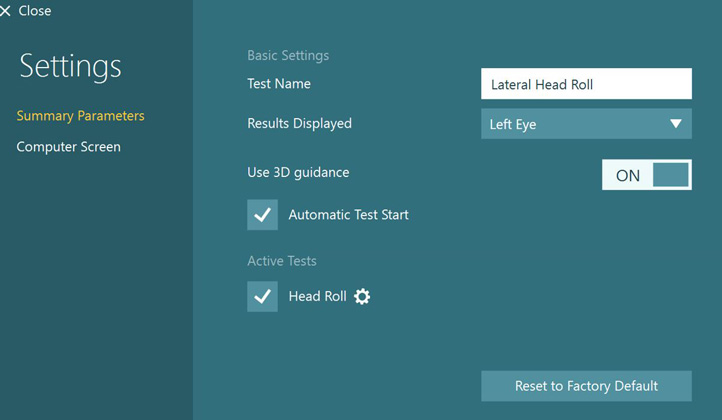
Summary Parameters screen for Lateral Head Roll, including the option to enable or disable Automatic Test Start.
Figure 7: Automatic Test Start.

For further assistance, please refer to the Instructions for Use and Additional Information manuals.

Presenter
Dr Michelle Petrak

Dr Michelle Petrak

Dr. Michelle Petrak is the Director of Clinical Audiology for Interacoustics and is a licensed, practicing audiologist in the Chicago area. Dr. Petrak received her Doctorates in Electrophysiology and Biomolecular Electronics from Wayne State University in 1994 and her Masters in Audiology in 1989. Her special areas of expertise include vestibular and balance testing (VNG), electrophysiological techniques (ABR/ASSR/VEMP/ECoG) and pediatric audiology. Dr. Petrak is involved with product development, clinical evaluation testing, publishing, teaching and training on VNG and EP topics. In addition to being employed with Interacoustics, she is also a licensed and practicing audiologist at Northwest Speech and Hearing in Arlington Heights, IL. She continues to lecture extensively, nationally and internationally, and to publish articles in hearing industry journals.
Available Training

How to perform the Active Head Rotation test

Learn how to perform the active head rotation (AHR) test in the VisualEyesTM software.

Dr Michelle Petrak2026-10-02

How to perform the Advanced Dix-Hallpike test

In this guide, you will learn how to perform the Advanced Dix-Hallpike using the VisualEyesTM videonystagmography (VNG) system.

Dr Michelle Petrak2026-10-02

How to perform the Brandt-Daroff Exercise

Click here to learn how to perform the Brandt-Daroff Exercise.

Interacoustics2026-10-02

How to perform calibration procedures

In this guide, you will learn how to calibrate the VisualEyesTM videonystagmography (VNG) system.

Dr Michelle Petrak2026-10-02

How to perform the Caloric test

Learn how to perform the caloric test with videonystagmography (VNG) equipment.

Interacoustics2026-10-02

How to perform Cervical Gaze testing

Two additional gaze positions are now available in VisualEyesTM 525 as an option to include in your test battery: Center Body Left and Right. Learn more.

Dr Liz Fuemmeler2026-10-02

How to perform the Dix-Hallpike test

Learn how to perform the Dix-Hallpike test, including precautions, patient instructions, the step-by-step test procedure, results interpretation, and more.

Interacoustics2026-10-02

How to perform the Dynamic Visual Acuity (DVA) test

Learn how to perform the dynamic visual acuity (DVA) test in the VisualEyesTM software.

Dr Michelle Petrak2026-10-02

How to perform the Epley Maneuver

Learn how to perform the Epley Maneuver for treatment of posterior canal BPPV. Includes a step-by-step procedure with images and helpful hints. Read more.

Interacoustics2026-10-02

How to use VisualEyesTM EyeSeeCam

In this guide, you will learn how to use the EyeSeeCam vHIT software within the VisualEyesTM videonystagmography (VNG) system.

Dr Michelle Petrak2026-10-02

How to perform the Functional Vision Head Impulse Test (fvHITTM)

The Functional Vision Head Impulse Test (fvHITTM) provides functional information on how clearly the patient sees in response to quick head impulses. Read more.

Dr Liz Fuemmeler2026-10-02

How to perform the Gaze test

Learn how to perform the gaze test with videonystagmography (VNG) equipment.

Interacoustics2026-10-02

How to perform the Gaze Stabilization Test (GST)

Learn how to perform the Gaze Stabilization Test (GST) in the VisualEyesTM software. Click here to read more.

Dr Michelle Petrak2026-10-02

How to perform the Gufoni Maneuver

Learn how to perform the Gufoni Maneuver in this short guide. Includes a step-by-step procedure with images and helpful hints. Read more.

Interacoustics2026-10-02

How to set up and troubleshoot monitors for oculomotor and optotype tests

In this quick guide, you will learn how to set up and troubleshoot monitors for oculomotor and optotype tests in the VisualEyesTM software. Read more.

Dr Liz Fuemmeler2026-10-02

How to use keyboard shortcuts in VisualEyesTM

VisualEyesTM has several software functions that are available through a computer keyboard. These allow for the user to access quick buttons for easy navigation.

Dr Liz Fuemmeler2026-10-02