ASSR Hearing Test
What is the auditory steady-state response (ASSR)?
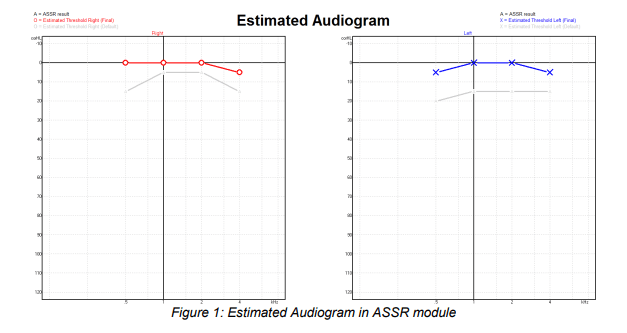
The auditory steady-state response (ASSR) is an electrophysiological response that is evoked by a periodically repeated (rapid) auditory stimulus. An ASSR typically uses frequency specific stimuli (0.5, 1, 2, 4 kHz) with the goal of creating an estimated audiogram. In other words, it is a test used for performing a threshold assessment.
Unlike auditory brainstem response (ABR) which looks at amplitude and latency of the response in the time domain, ASSR looks at amplitudes and phases in the frequency domain. Responses are detected using a statistic-based mathematical detection algorithm to determine if a response is present or not. Another difference is that while it is only possible to test one frequency per ear at a time in frequency-specific threshold ABR. ASSR allows for binaural testing; four frequencies in each ear at the same time (eight simultaneous presentations).
To convert the ASSR responses detected in nHL to eHL (estimated Hearing Levels), a correction factor is typically applied to each response to arrive at the final audiogram. Note that the estimated threshold cannot exceed 0dB eHL.
Why do ASSR testing?
The ASSR technology is completely objective and based on statistical probability rather than subjective assessment of response waveforms. The most important audiological application of ASSR is to provide an estimate of the pure tone audiogram, which is used for rehabilitation purposes.
How to do ASSR testing
Patient preparation is very important. The electrode sites must be prepared and cleaned in order to obtain acceptably low skin impedance. It is recommended to have impedance values below 3kΩ or lower.
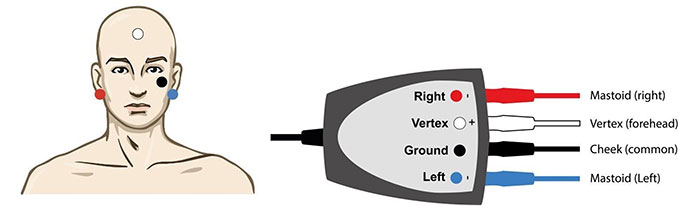
The same electrode placement for ASSR is also used for ABR allowing for easy switching between the test types.
Electrode placement (example)
Make sure that the patient is relaxed prior to starting the test. You can monitor this by watching the EEG. Window in the top right hand corner of the recording window. A relaxed patient will typically show black EEG curves within a ±40 volt rejection setting.
Setting up the Eclipse
The Eclipse ASSR software comes with pre-programmed protocols, so the system is ready to use immediately. Protocols can be created or modified easily to fit your clinic need. Consult your manual to learn how to create or modify a protocol. The procedure described below is simply a suggested test process and to be used only as a guideline.
Basic ASSR test procedure
Starting ASSR from OtoAccess or NOAH
- Switch on your PC and wait for Windows® to start.
- Double click on the OtoAccessTM or NOAH icon

- Choose an existing client or enter and save a new client.
- Double click on the ASSR icon

Performing an ASSR measurement
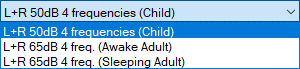
- Select desired ASSR test protocol.
- Adjust the rejection level if rejection occurs and if possible, instruct the patient to relax.
- Click on the Start button to begin the ASSR test.

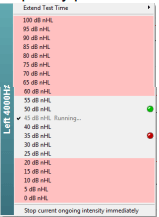
- As results are obtained, additional test intensities can be selected by right clicking within the desired frequency panel. From here it is also possible to extend or stop the test.
- Click on the Audiogram tab, to see the Estimated Audiogram anytime.
- Correction is typically applied using a correction table or by manually dragging audiogram points using the mouse.
- Click on the print button in the toolbar or choose Print under the File menu.
- Click on the Report button. Select a report template. Modify text if needed.

- Click on the save and exit button in the toolbar.
Other helpful tools
Temporary change to Auto Test
Prior to starting a test, the default selection of frequencies to be tested can be modified in the "Stimulus" section in the upper left hand corner of the recording screen. 
Temporary Setup
Disable or enable frequencies, change intensities, adjust parameters for patient arousal state etc., temporarily for this session. See the manual for more information. Changes are effective in the current session only and will NOT permanently change the test protocol. Masking is also applied from the Temporary setup if required.
Browse between historical sessions
Use the PgUp and PgDn keys to toggle between historical sessions. Or select them manually from the Menu bar.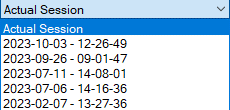
Toggle between 40 Hz and 90 Hz stimulation rate
Two different stimulus rates are available: 40 Hz and 90 Hz. 90 Hz is typically used for infants and sleeping adults while 40 Hz is gaining popularity for its typically strong response in awake adults.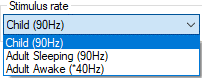
ASSR shortcuts
Ctrl + S Save session
Ctrl + P Print session
Ctrl + F7 Temporary setup
F2 Run test
F4 Pause / resume test
F7 Report
Alt + X Save and exit
Presenter