
Basic Audiometry
The purpose of this document is to provide a quick guide for basic functions of the AC440 Audiometry modules for the Affinity Suite. This quick guide will focus on pure tone audiometry as well as a basic introduction to the various icons, tools and menus available.
Starting up the AC440 Module
- Launch the Affinity Suite from Noah or OtoAccess®.
- Click on the AUD tab on the upper right hand side of the screen.
- Click on the
 icon to launch the tone audiometry screen, if Tone audiometry is not the default screen.
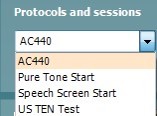
 - Select the desired Audiometry protocol from the "Protocols and Sessions" drop down list.
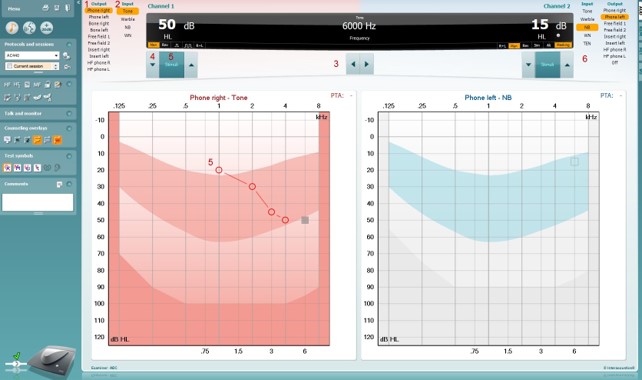
Conducting pure tone audiometry
- Choose the transducer type.
- Choose the Stimulus type.
- Choose the test frequency :

- PC Keyboard: right/left arrow keys.
- Mouse mode: Left/Right arrow buttons.
- Choose the intensity:

- With PC keyboard: use the up/down arrow keys.
- Mouse mode: Up/Down arrow buttons.
- Presenting the stimuli:

- PC Keyboard: press on the space bar or left Ctrl button.
- Mouse mode: hover the mouse over the Stimuli button.
- If masking is necessary:
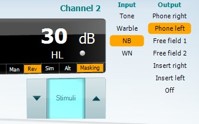
- Turn on masking in Channel 2 by ensuring that the desired transducer is selected for non-test ear.
- Ensure that the word "Masking" is highlighted in orange.
- Choose "Rev" to present the masking noise continuously.
- It is also possible to turn on Automasking or Masking help[1].
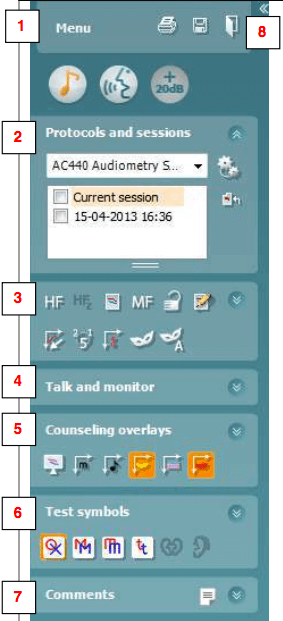
Navigation: Tools and functions
 |
|
Presenter